1. In the Events area of Organise, find your event. In the 'Upcoming Events' tab you will see all events in the area that you have access to on Organise. You can click 'Your Events' to see just events that you have created or type to search for a specific event by name in the search bar.
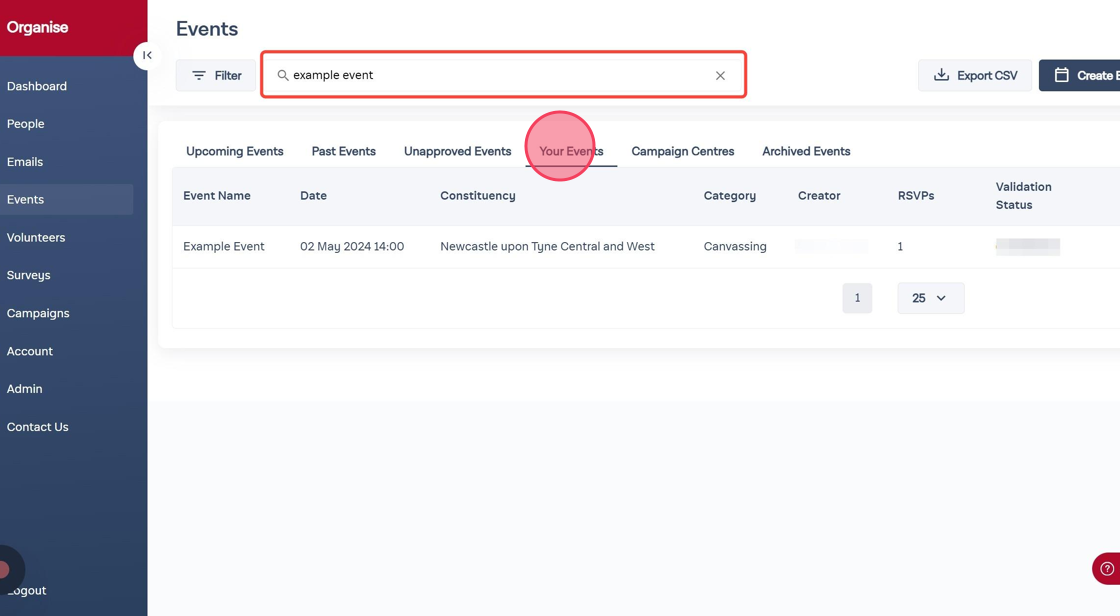
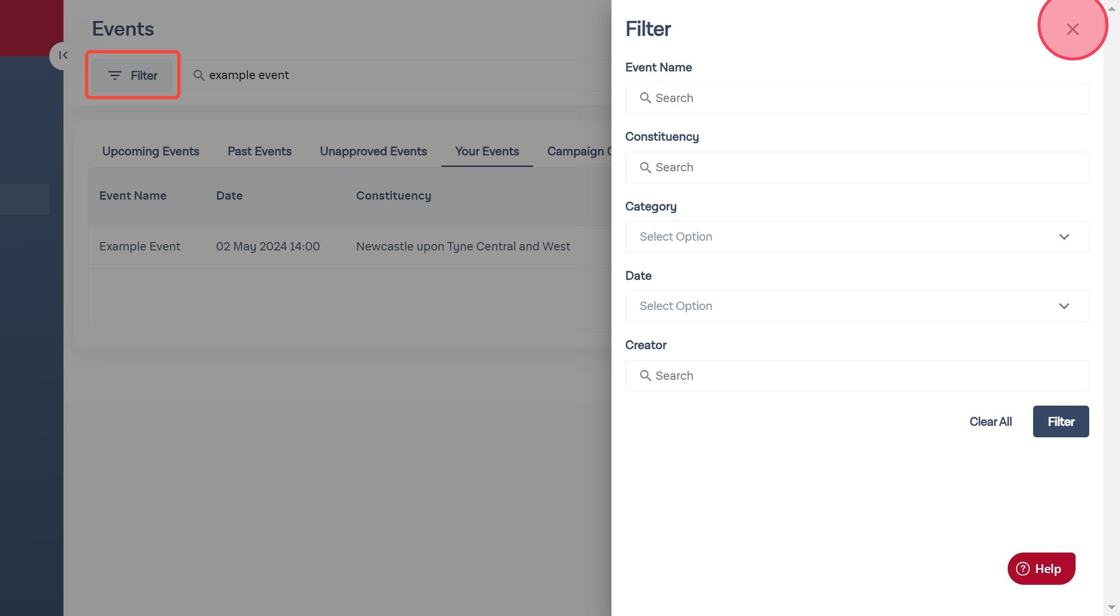
2. You can also use the Filter option to search for events by constituency, event type (category), date or by who created it. Click 'Filter' near the top left of the screen to open the filter menu.
3. Click anywhere on the row corresponding to your event to go to the event management page, or select the three dots to the right to see more options such as 'Unapprove' and 'Archive'. If your event is cancelled, you can use the 'Unapprove' function to return it to draft form, and archive to remove it from your current events list.
You can also click 'View on Events Tool' to see your website on the Events site, duplicate your event, send an email to event RSVPs or click 'Share Event' to download a QR code or weblink for your event webpage.

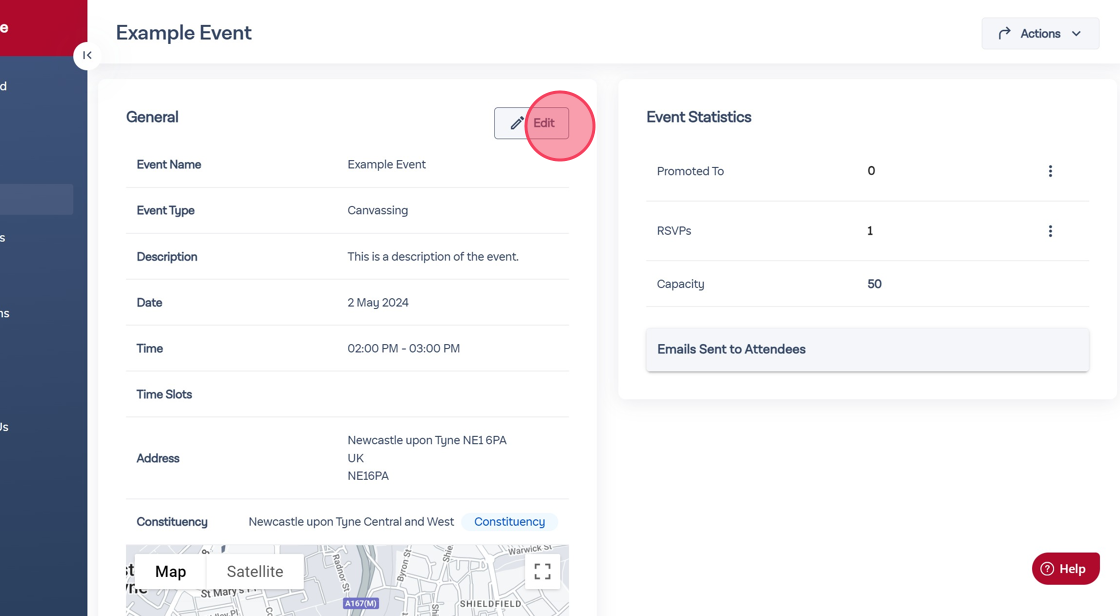
4. In the events management page you can amend your event details and administer RSVPs. Click 'Edit' to change any details such as name, description, date and time.
5. Click on 'Actions' for basic functions including 'Archive' to remove your event, duplicate, 'Promote Event' to go to the Organise email builder with your event included as a link and 'Share Event'.

6. Clicking 'Share Event' opens the share options menu, where you can download the QR code for your event, copy a webpage link or share on social channels.

7. Event Statistics are displayed to the right, showing how many people your event has been promoted to in Organise emails, how many RSVPs you have received and the event capacity if relevant. You can also click to see a list of emails that have been sent to your event RSVPs.

8. Your event RSVPs are at the bottom of the event management page. You can see a list of people who have signed up online to your event and you can add in RSVPs. Please note that you can only add RSVPs for people who already exist on Organise. Click 'Actions' and then 'Add RSVP to Event' to add new RSVPs.
You can also select 'View RSVPs in People Table' which will take you to the People area of Organise with your RSVPs as your audience. You may wish to add columns to see more information, or used this as a custom audience for Dialogue calling.
You can also select 'Email RSVPs' from this menu to take your RSVPs as an audience through to the Organise email builder.

9. Type to search for your RSVP by name and click on the name to add them, then click 'RSVP'.

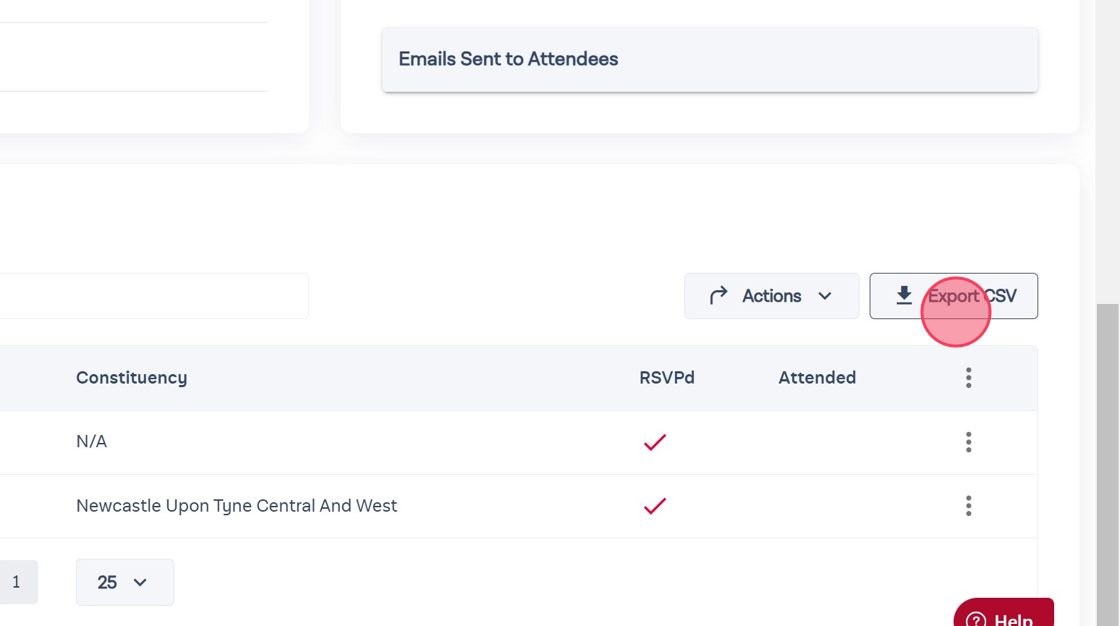
10. You can export your RSVPs by clicking 'Export CSV'.
11. In the same way that you can add an RSVP to your event, you can also add an Attendee. You could use this option to add a person who did not RSVP but did attend. Click 'Add Attendee to Event' and follow the same steps as adding an RSVP.

12. Event attendees will be marked with a tick in both the RSVPd and Attended column. RSVPs can mark themselves as attended by using the event QR code.

13. If your RSVPs are not able to mark themselves as attended using the event QR code, you can mark them as attended in your event management page by clicking the three dots to the right of their name and clicking 'Mark as Attended'.
